Every kid should make something and exhibit at Maker Faire!
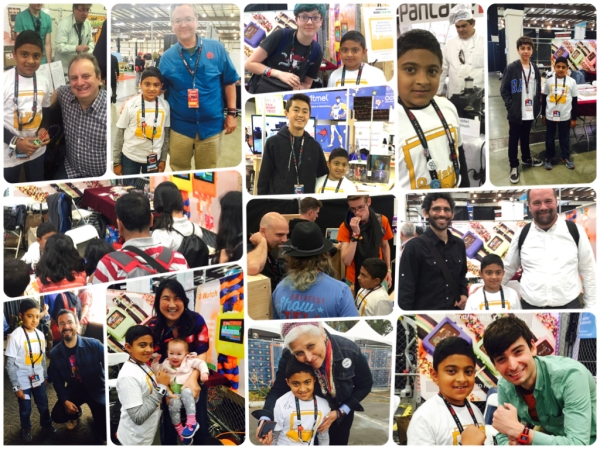
Maker Faire Bay Area is one of the few events where kids of all ages get to show off their creations to a large audience and get a chance to meet makers, inventors and leaders from all over the globe. And this year it was bigger and better!
For Omkar (a huge fan of Mythbusters), the absolute highlight of the event was meeting Adam Savage!
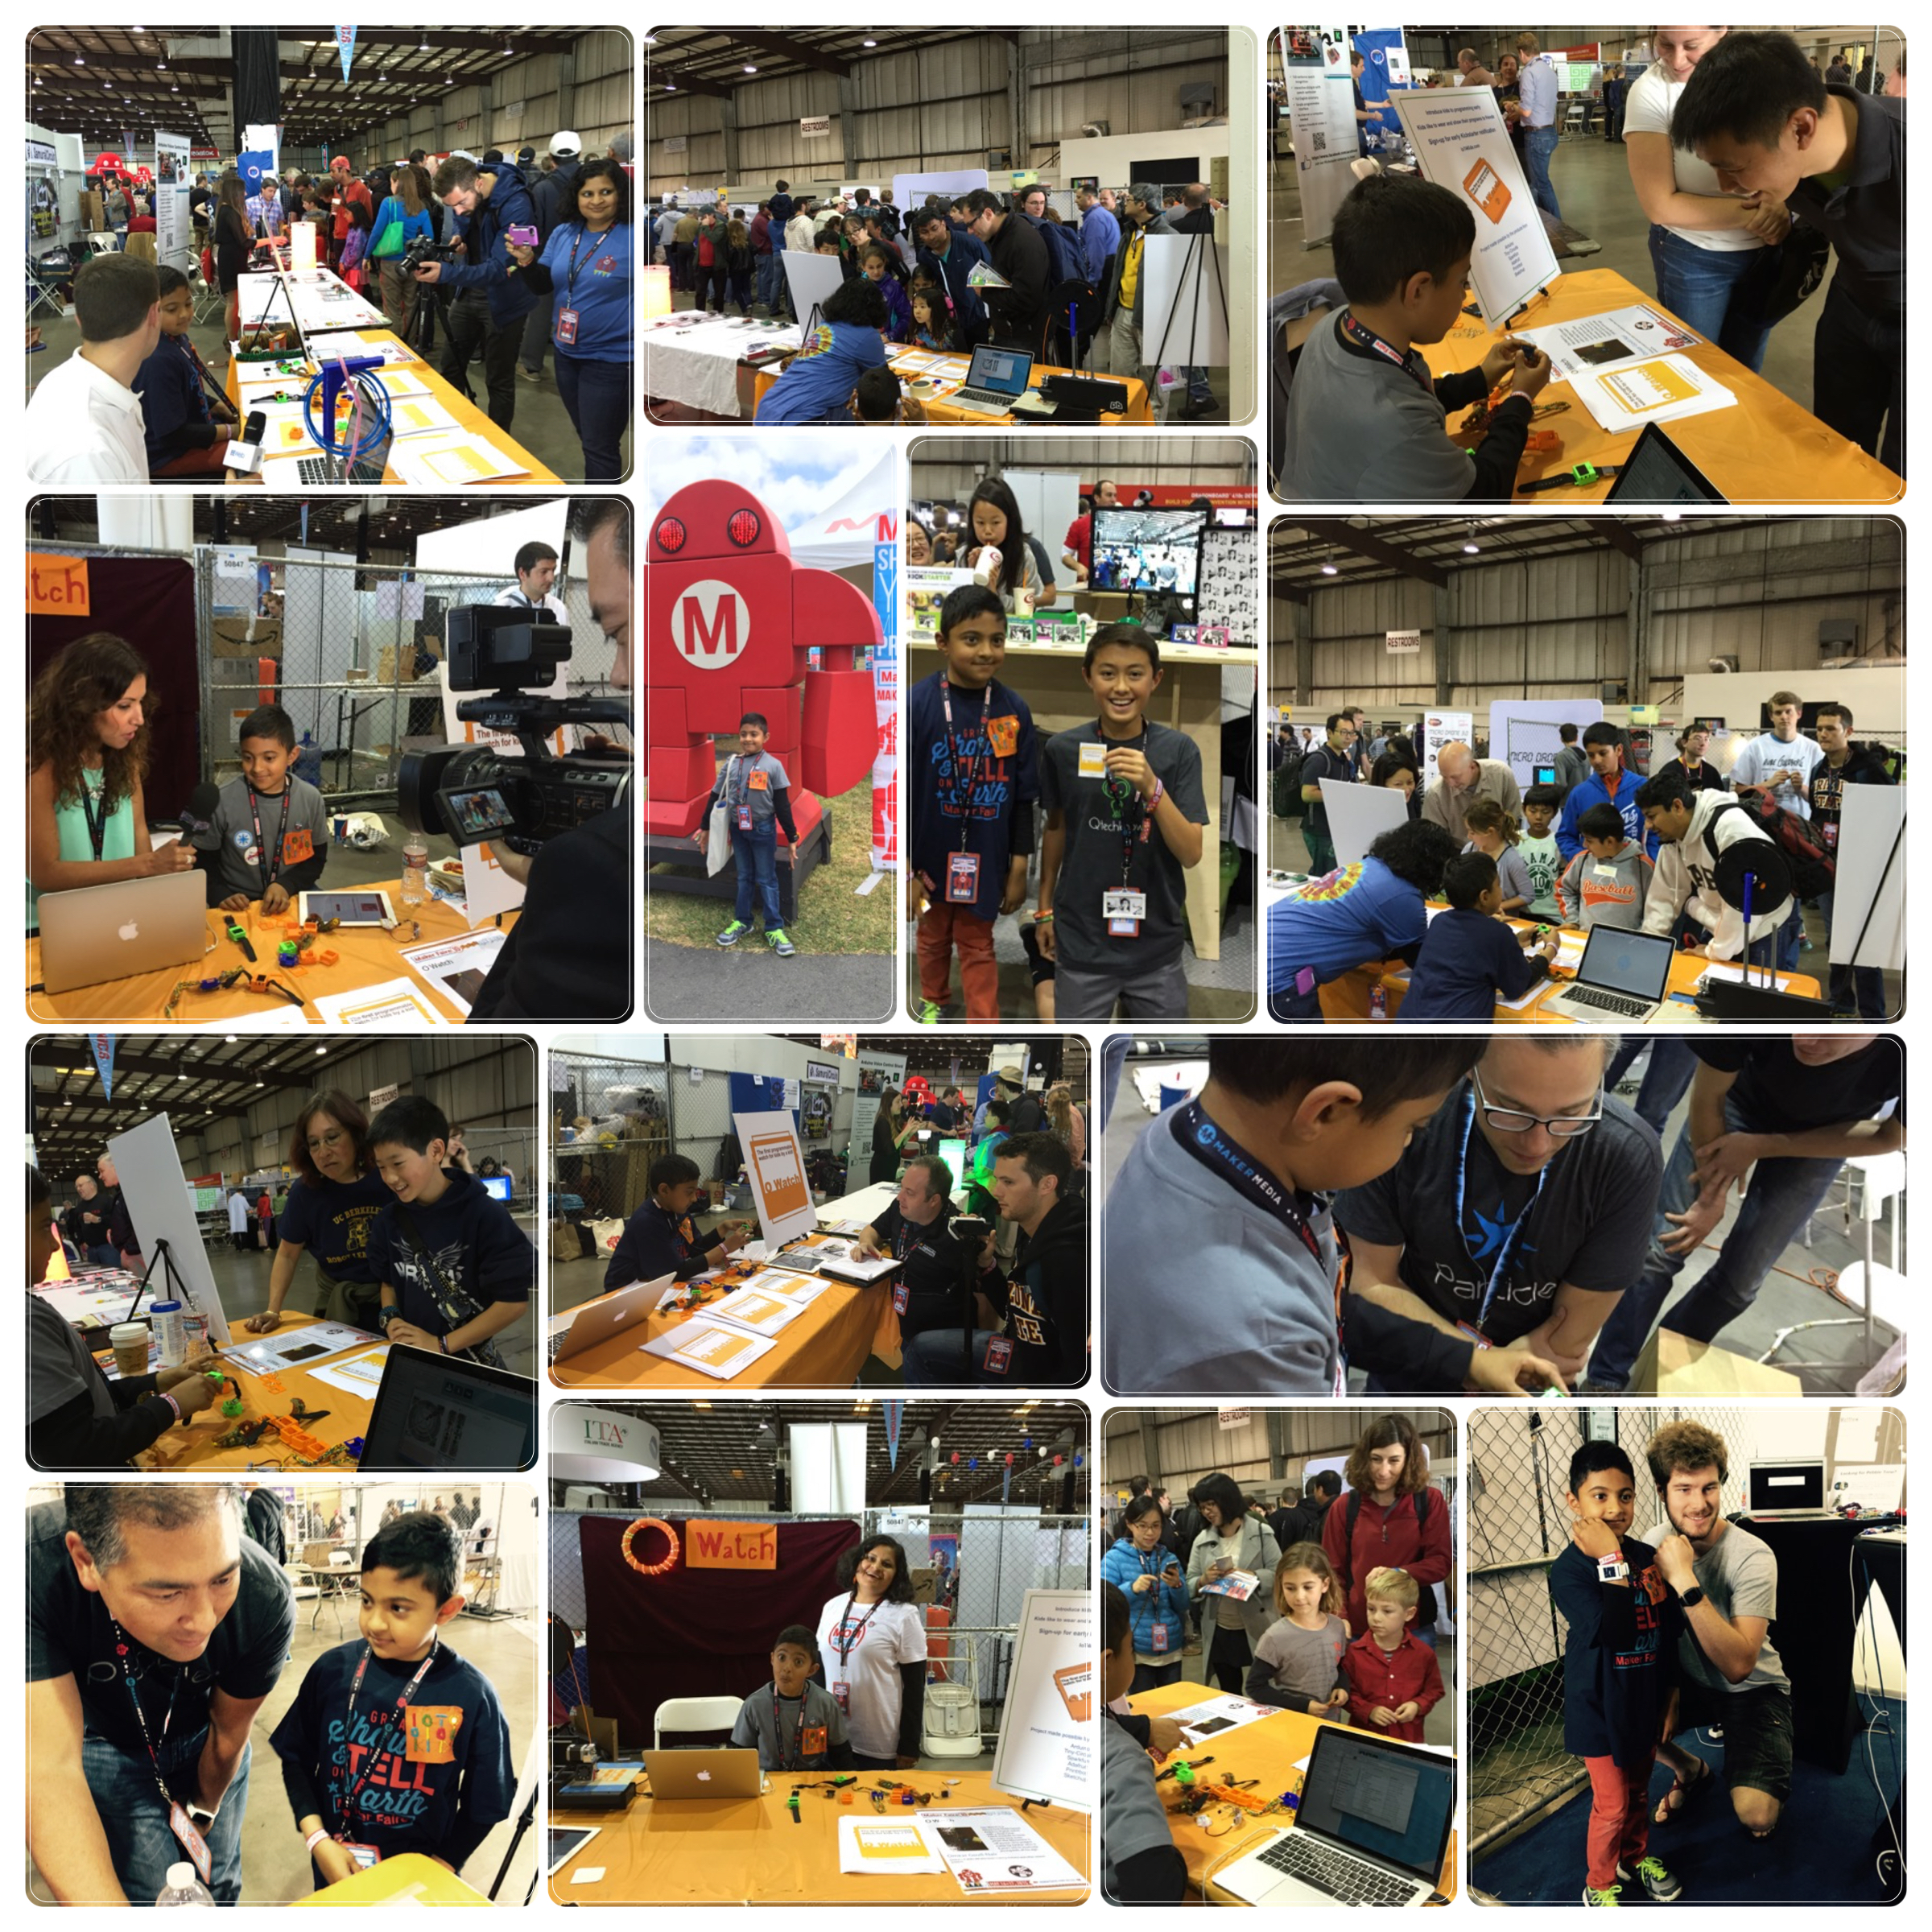
The biggest shout out for Omkar’s project came from none other than Massimo Banzi, the co-founder of Arduino, who talked about Omkar and O Watch in his annual State of Arduino address (at 15:30 in this video)!
The best part of Maker Faire is meeting old maker friends and making new ones, not to mention experiencing all the cool exhibits and activities.
Some of the kid makers we came across (there were many others):
Fillet Gauge Tool by Tuna who came all the way from Turkey and won a ‘Best in Class’ award for his creation.
Mark you calendars for the next Maker Faire or similar event near you and encourage+help your child make and exhibit something. It’s just an awesome experience for kids! Nothing quite like Maker Faire Bay Area.
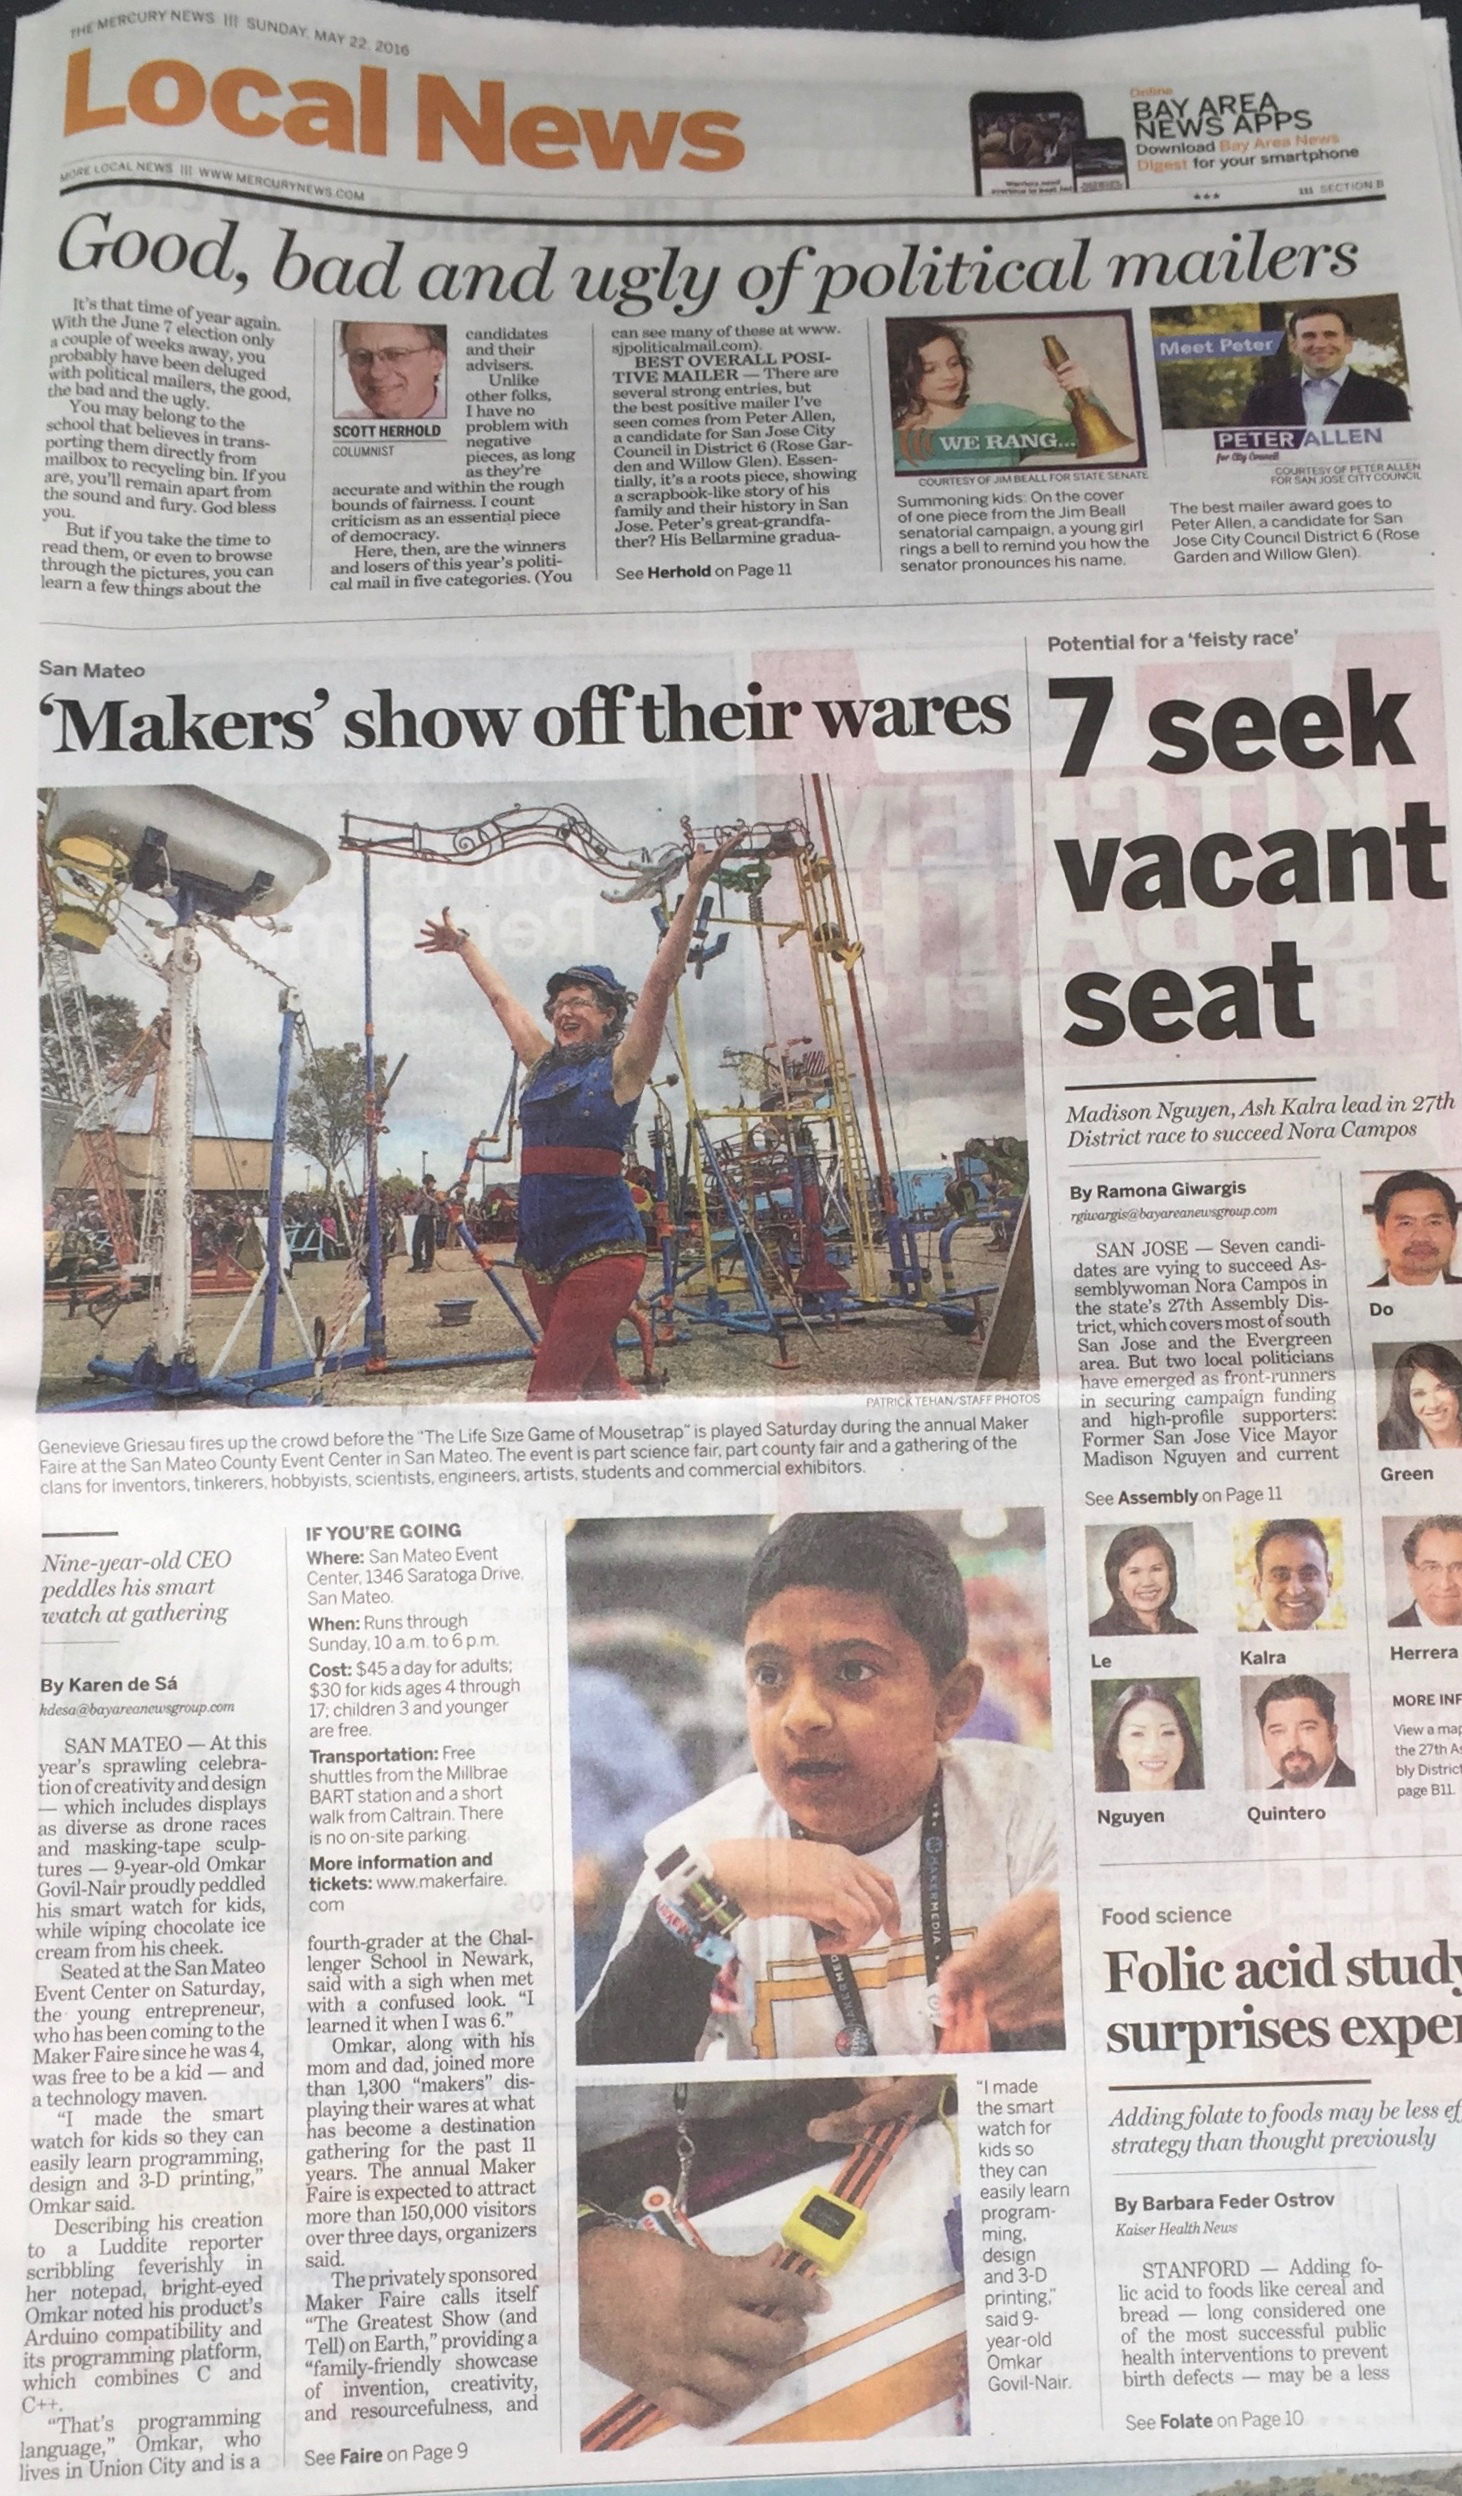
And one more thing…. Omkar got featured in the local newspaper! 🙂 🙂
It was back in 2013 Omkar made his very first Arduino project at the age of 6 having attended couple of Maker Faires by then. At the 2014 Maker Faire, he got to meet Quin and several other kid makers inspiring him to dream of starting a business. But he had to come up with a product idea first. 🙂 After toying with several ideas, he decided on making a kid’s smartwatch. His first effort was received with much encouragement from the maker community including Atmel and Adafruit.
Omkar exhibited a prototype at MFBA 2015 and got validation from other kids and parents who showed keen interest. All the words of encouragement from makers and well wishers including the folks from Particle, Pebble and Atmel motivated him to go ahead with the project. This really speaks to the spirit of the Maker Faire community that is super supportive of all makers, especially kids.
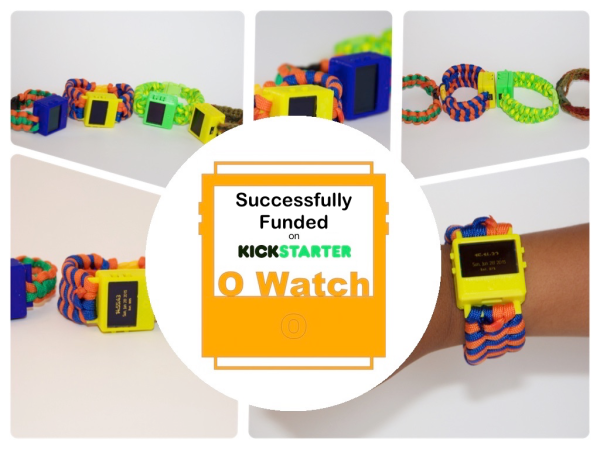
There Omkar also met the CEO of TinyCircuits who kindly accepted our request to partner and supply the required electronics. Further, Kickstarter made it possible for him to bring O Watch to market with the kind support of awesome backers from across the globe.
Omkar’s vision for O Watch is to inspire kids to get started with design, 3D printing, crafting and coding while making a fully functional product they can use daily. And he wishes to meet more makers and partners at MFBA16 to make O Watch even better and accessible for kids.
If you are in Bay Area, don’t miss Maker Faire! It is the event where kids will get exposure to all types of making and meet budding entrepreneurs to experience first hand the basics of kickstarting a business.
Please stop by the O Watch exhibit in Zone 2 for a chance to win an O Watch! For those who are unable to make it to MF, we’ve a 10% discount to celebrate Maker Week using the promo code 10OFFMF16 via the O Watch store.
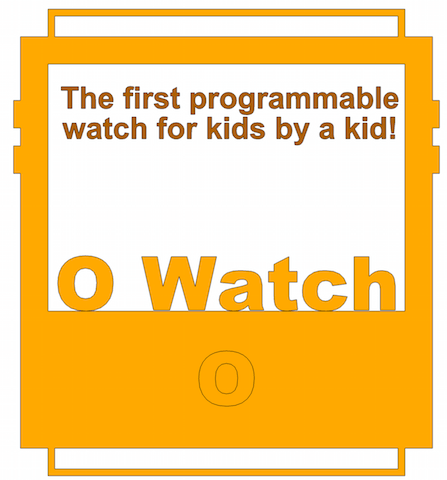
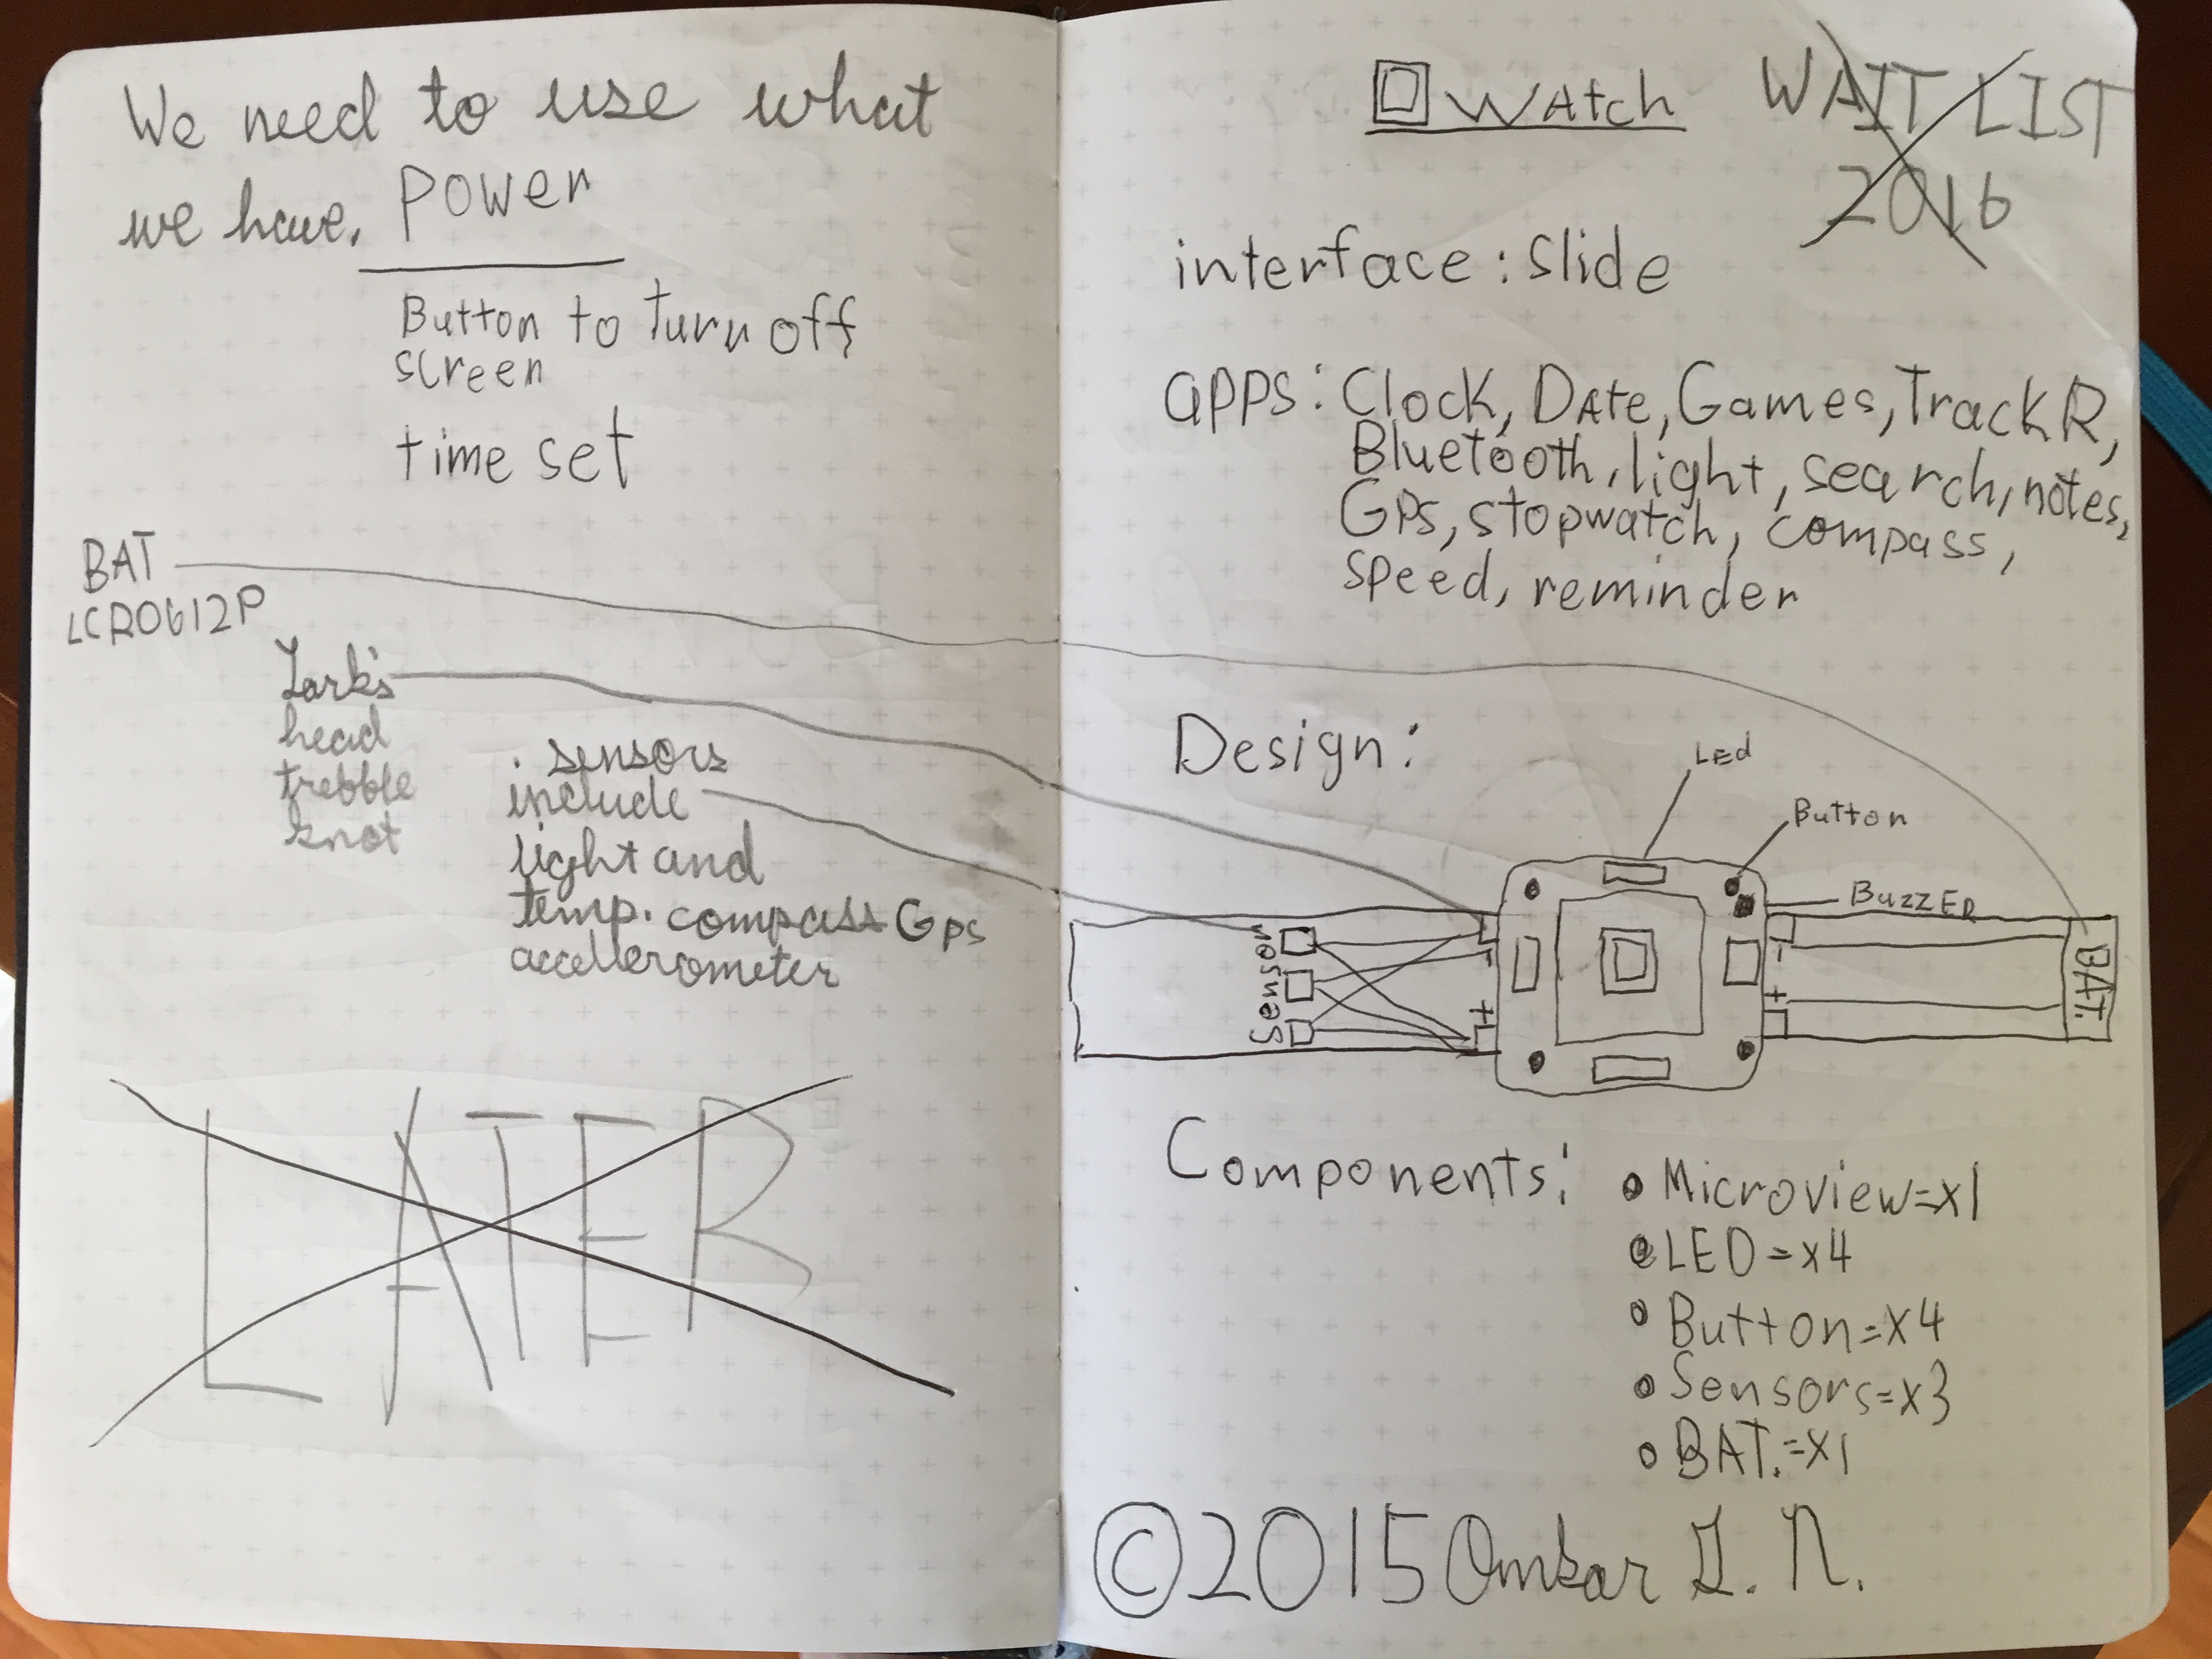
O Watch is an Arduino based smartwatch kit for kids to get started with hands-on programming and 3D design. It comes with a complete set of components and easy-to-use instructions to create your own smartwatch. You can customize it by creating 3D printed watch cases and colorful straps using various band making techniques like paracording.
The O Watch kit comes in two variants:
Base watch kit: Arduino Zero based programmer board with integrated color OLED screen, LiPo battery, 3D printed watch-case and para-cord kit.
Smartwatch kit: Base watch kit plus sensor board with integrated 3 axis compass, temp, barometric pressure and humidity sensors.
O Watch Cases 3D Printing: O Watch cases can be 3D printed at home or via one of the several 3D printing services or maker-spaces convenient to your location. We are actively working on creating a 3D printing partner ecosystem for kids to easily customize and 3D print O Watch cases in a variety of colors and materials.
The folks at Particle (erstwhile Spark) are awesome – they make great IoT products and are really super nice people. They gifted Omkar a Photon at the MakerFaire. His summer break just started and this was his priority #1.
Omkar wanted a way to know when someone mentions or follows @IoT4Kids. Particle makes this incredibly easy to do with just a few lines of code. You essentially can make any action happen (light up or move something and/or make some noise) based on Twitter activity using their Arduino compatible WiFi integrated micro-controller and their integration with IFTTT.
This simple example lights up an LED.
BTW, the display box is 3D printed using Printrbot Simple which is another awesome product for kids to get started with 3D printing.
This is all made so easy with the Particle Spark.Function() that is triggered ‘automagically’ 🙂 from IFTTT. All you need is the code below and create a recipe with Twitter trigger and Particle action.
int ledpin = D7;
void setup()
{
// register the cloud function
Spark.function("tweet", twittermessage);
pinMode(ledpin, OUTPUT);

}

void loop()
{
delay(5000);
digitalWrite(ledpin, LOW);
delay(5000);
}

// this function automagically gets called upon a tweet mention
int twittermessage(String ignore)
{
digitalWrite(ledpin, HIGH);
return(0);
}
That’s Omkar’s statement after exhibiting his O Watch as a maker for the first time at Maker Faire 2015 Bay Area. Thanks to the organizers, volunteers and all the amazing makers, attendees and exhibitors for the encouragement and support.
The O Watch is a ‘Precise Time Keeper’ :). Using a DS3231 Real-time-clock (RTC) module with a backup battery, it is able to keep time for years with high precision. This is made using Sparkfun Microview, RTC module and a LiPo battery and charger from Adafruit.
This uses a 300 LED Adafruit Neopixel strip driven by Sparkfun Spectrum Shield (make sure you buy the stackable headers with this) and Arduino Uno. The connections are fairly simple as shown in this pic. Apart from the ground and 5v you just need to connect one data pin to the Neopixel strip to control it (refer to Adafruit Neopixel Guide). There are two standard 1/8″ audio jacks on the Shield that you can connect input audio and pass through the other to your speaker.
#include <Adafruit_NeoPixel.h> // include the Adfruit Neopixel library

#define PIN_NEOPIXELS 8 // connect Neopixel strip to this pin
#define PIN_STROBE 4 // spectrum shield strobe pin
#define PIN_RESET 5 // spectrum shield reset pin
#define PIN_SOUND 1 //analog input pin spectrum shield - using only one/right channel
#define NUMLEDS 300 // LEDs in Neopixel strip

#define MINPOWER 128 // minimum amplitude value to be considered
#define MAXPOWER 1023 // max amplitude value

Adafruit_NeoPixel strip = Adafruit_NeoPixel(NUMLEDS, PIN_NEOPIXELS, NEO_GRB + NEO_KHZ800);

int soundvalue[7]; //band array to store amplitutde value for each band

void setup()
{
 strip.begin(); //initialize neopixels
 strip.setBrightness(35);
 strip.show();
 //initialize spectrum shield graphic equalizer
 pinMode(PIN_RESET, OUTPUT); // reset
 pinMode(PIN_STROBE, OUTPUT); // strobe
 digitalWrite(PIN_RESET,LOW); // reset low
 digitalWrite(PIN_STROBE,HIGH); //pin 5 is RESET on the shield
}

void loop() {

 readMSGEQ7();
 int bColor = colorValue((soundvalue[0]+soundvalue[1])/2);
 int gColor = colorValue((soundvalue[2]+soundvalue[3]+soundvalue[4])/3);
 int rColor = colorValue((soundvalue[5]+soundvalue[6])/2);
 byte red = rColor; //convert to 0-255 byte value for Neopixel
 byte blue = bColor;
 byte green = gColor;

 for (int i = 0; i < NUMLEDS; i=i++) //show strip
 {
 if(i<=240) {strip.setPixelColor(i, (i<=rColor) ? red : 0,(i<=gColor) ? green : 0,(i<=bColor) ? blue : 0);}
 else {strip.setPixelColor(i, (i<=rColor) ? 255 : 0,(i<=gColor) ? 255 : 0,(i<=bColor) ? 255 : 0);}
 } //you might have to play with this based on your setup. The if statement is to make the top LEDs show brighter
 strip.show();
 delay(5);
}

int colorValue(int powerValue) // calculate a a RGB color value from the sound bands
{
 return map(powerValue, MINPOWER, MAXPOWER, 0, NUMLEDS);
}

// Read the Analog sound data from 7 bands
void readMSGEQ7()
{
 digitalWrite(PIN_RESET, HIGH); //reset the data
 digitalWrite(PIN_RESET, LOW);
 for(int band=0; band < 7; band++) { //loop thru all 7 bands
 digitalWrite(PIN_STROBE,LOW); // go to the next band
 delayMicroseconds(10); //gather some data
 soundvalue[band] = analogRead(PIN_SOUND); // store left band reading
 digitalWrite(PIN_STROBE,HIGH); // reset the strobe pin
 }
}


